![]()
![]()
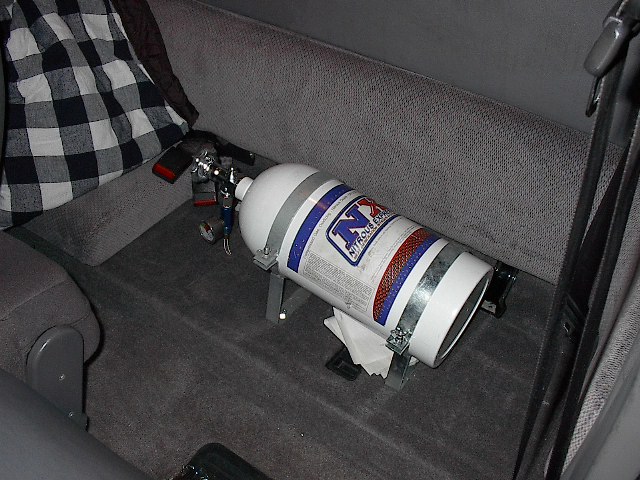 I chose to mount the bottle in place of the rear seat. Find a suitable place to mount your bottle, make sure you have enough line to reach the nitrous solenoid. I simply removed one of the covers that are beneath the rear seats, drilled 4 holes and mounted the brackets for the bottle.
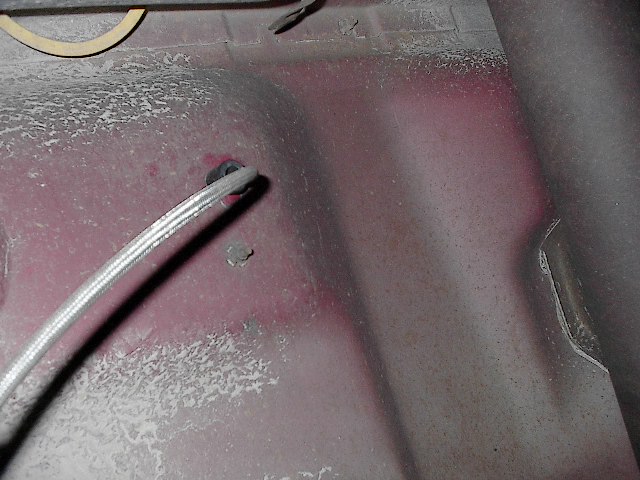 Drill a hole through the floor, large enough to feed the line through. Use a rubber grommet to insulate the line against the metal of the floorpan. Make sure the hole will line up with the top of the bottle... measure twice and drill once!
 Run the supply line up the frame rail and into the engine compartment. ***tip*** Tightly wrap some electrical tape around the ends of the nitrous line so that you don't get any debris in the line which can plug the solenoid.
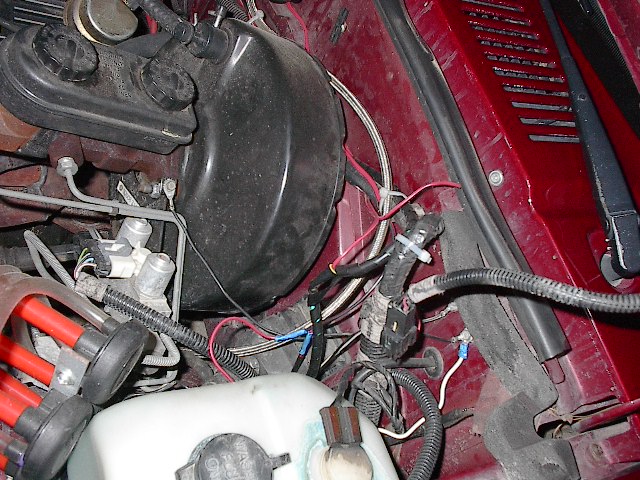 Run the line up from the frame rail, make sure that it is clear of the usual hot/sharp/moving objects. Secure it along the firewall with whatever, I used wire ties, would look better using some line clamps.
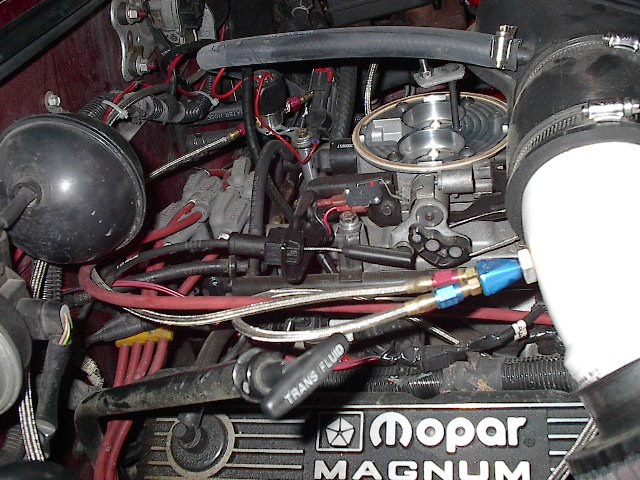
 Now is a good time to mount the solenoids. I chose to use the mounting bolts that hold the fuel rails down, although this might not be a choice with the stock manifold. Make sure wherever you mount them that you have enough line to run from the supply line, the fuel line to the fuel rail test port, and back to the nozzle in the intake stream.
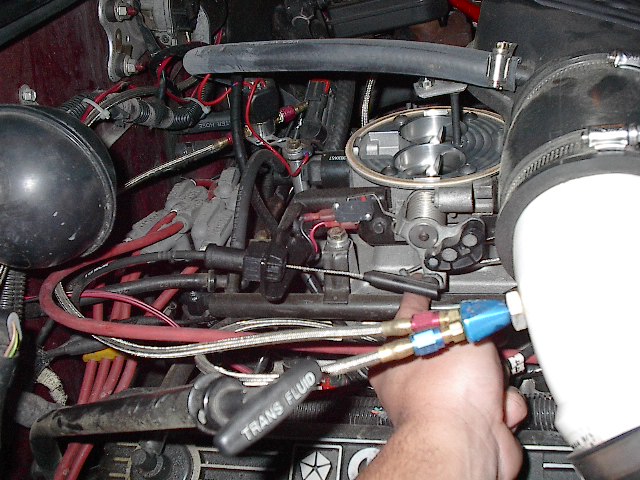
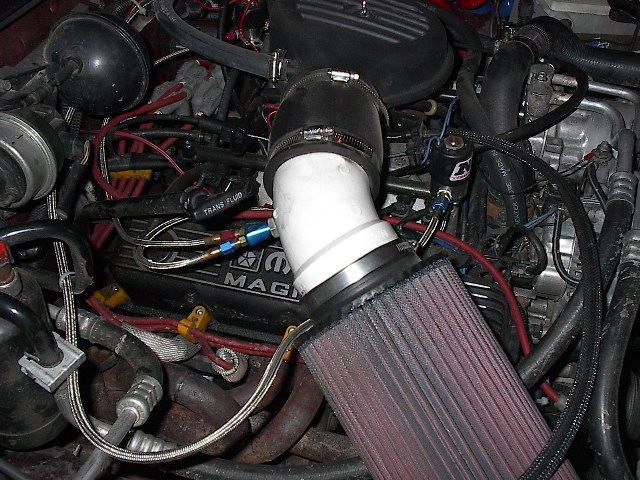 Attach the nitrous supply line to the nitrous solenoid, and run the line from the solenoid to the nozzle. Again, use the paste thread sealant. If you have not mounted the nozzle, do so before attaching the lines to it.
A quick note on the electrical side of the install before I proceed. The way I wired this kit in composes of two saftey switches. The system can NOT be used unless both the arming switch is 'on', and the WOT switch is 'on'. The saftey switch is mounted in the cab, which effectivly arms the WOT switch. Once the WOT switch is closed (flooring the gas pedal), the system will do it's thing (plant you to your seat) :)
I strongly recommend taking the extra time to install your kit in a similar fashion.
 Install the WOT switch on the TB as shown, it will take some trial and error fitting to make it just right, and you'll need to 'adjust' the lever on the switch itself.
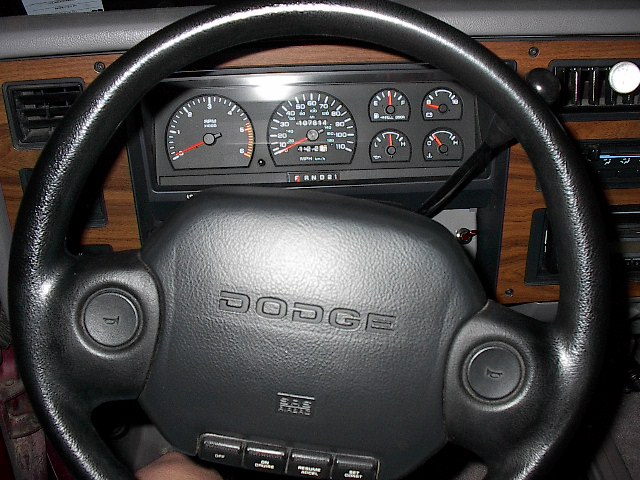 Install the saftey switch in an accessable place, easy to reach from the driver's seat. I chose the area just to the right of the ignition switch. A lighted switch is nice, so that you'll have a second visual reminder of when the system is armed.
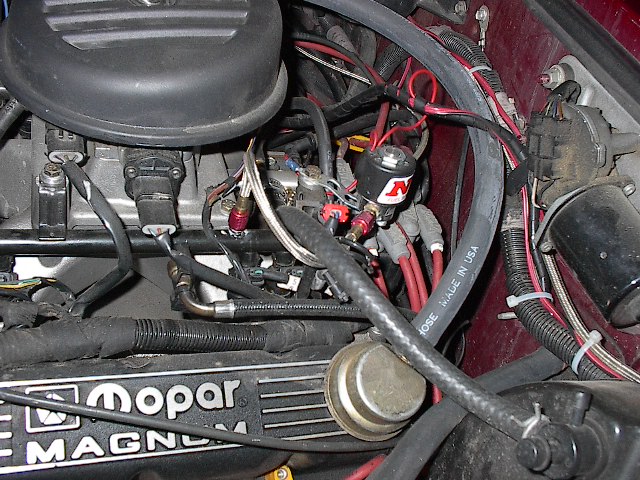
 Now you'll need to wire in the relay. The relay needs to be somewhat sheltered from dirt, heat, and expecially moisture. I chose to use one of the mounting screws on the washer reservoir so that I wouldn't have to drill another hole.
I would recommend starting with the smallest jets in the kit so that you'll get a feel for using nitrous. A very worthwhile investement would be dyno'ing the truck in conjunction with a wideband O2 meter hooked up to the exhaust, to make absolutely certain that you are not running lean while on the spray. Above all else, always remember lean conditions with nitrous WILL DESTROY your motor. ENJOY!! =)