![]()
![]()
Just a little bit of disclaimer, let it be known that I am not an electronic engineer, I am a graphic artist (that's why the diagrams look the way they do). I laid out this wiring to help my own installation, I hope it helps others. Caution should be used when following these diagrams. I'd hate for anyone to fry there truck because I didn't warn them of this.
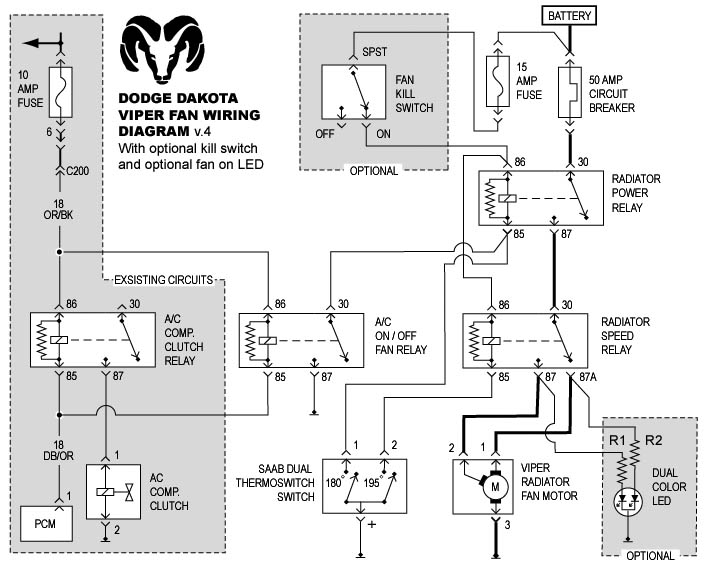
People are different, so upon requests I ended up making several wiring diagrams. I finished my wiring with only one minor problem, where I wanted to have 2 LEDs to show low and high speeds. For some reason, when power is applied to either the low or high terminals on the fan, voltage leaks back through the other wire from the motor causing both LEDs to light. For now I have omitted the high speed LED.

Thanks, Bernd for the input and the actual Viper diagram.
I ordered all of the small electrical components except the Saab temperature switch from Waytek Wire They did charge me an extra $5 small order charge, but they have some really cool components. Make sure your order exceeds $25 to avoid the charge. (these prices may not be current)
| Part Number | Part Description | Qty | Price | Total |
|---|---|---|---|---|
| 46551 | Circuit Breaker 50 Amp | 1 | $1.75 | $1.75 |
| 23541 | Circuit Breaker Boot Yellow | 1 | $0.53 | $0.53 |
| 75011 | Bosch Relays High Capacity | 3 | $3.07 | $9.22 |
| 75280 | Relay Connector | 3 | $0.73 | $2.19 |
| 46041 | Mini Fuse Holder | 1 | $3.00 | $3.00 |
| 31073 | Terminal for Relay Connector, 1/4", push-on, 14-16ga wire | 25 | $0.09 | $2.40 |
Saab temp switch $17 each shipped
Order form
Message about the switch
The switch's thread is 22m x 1.5, the wrench size is 29mm.
I made up the hose fitting using a nut that I got from a local plumbing supply I took it to a radiator shop and had them weld it to a piece of 1 1/2 radiator tubing approx 5" long. $2.50 for the nut and $20 for the pipe and welding and the guy even painted it black for me. It looks similar to the one in this photo: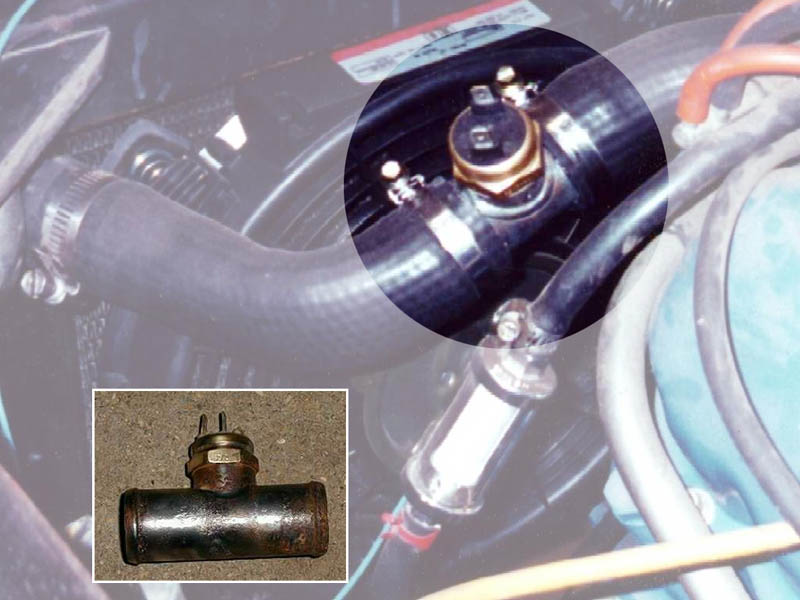
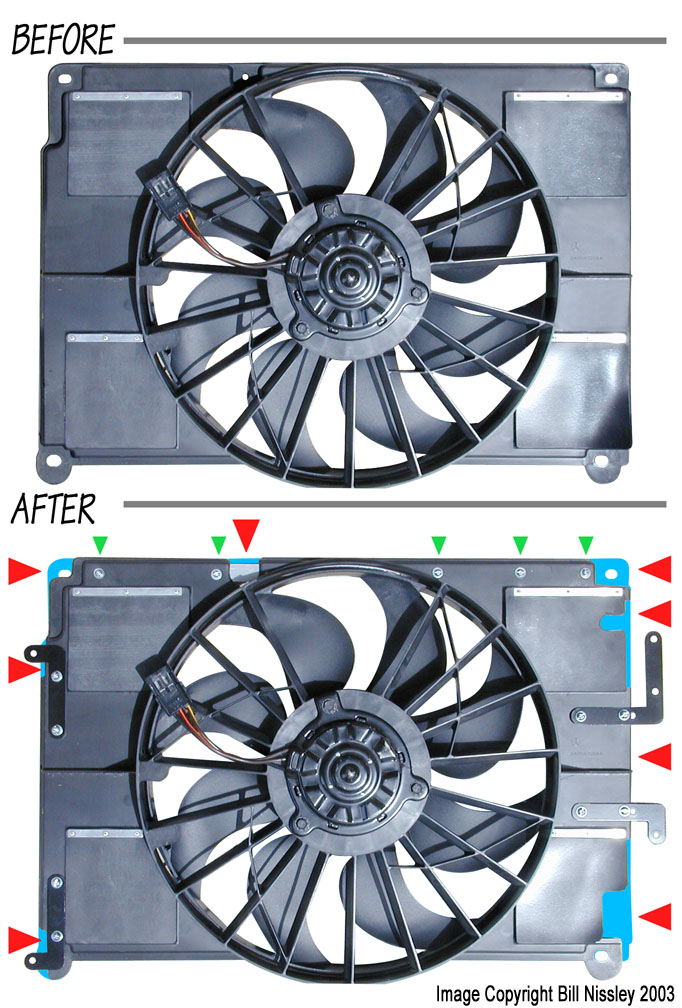
The blue is what was cut off the large red arrows identify those areas. The one arrow in the middle on the right side was a notch I had to make so the Trans cooler lines could pass through. The green arrows show the screws that I put in to hold an angle brace that I installed. To get it to go all the way across the top I removed the half circular area indicated by the arrow at the top. You can see the angle bracket peeking through at that spot.
The mounting brackets were fabricated from angle brackets that I got from Lowes. They mount the fan to the Dakotas factory locations.
This photo shows the clearance between the fan and the water pump.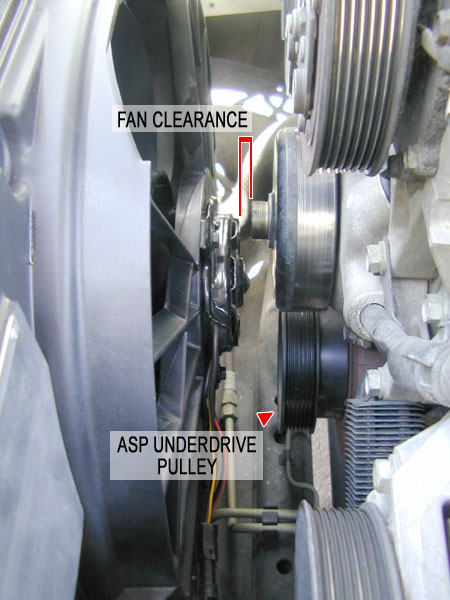
http://www.y2kota.us/viperfan.html